Now a days most of the site are secured sites and serving the content over the HTTPS. It will encrypt the content which served from server to user’s and help in maintaining the data integrity.
If your website serving mixed content like https content over the https then some browser will block those contents (call to api, images, etc.) and you will get the Mixed Content error in browser console like:
In the same way, when you are setting up your Sitecore JavaScript Services (JSS) application, we also need to take care that setup of Sitecore JSS Layout service and Sitecore JSS Dictionary Service should be configured over the HTTPS instead of HTTP to avoid the Mixed Content error at later stage.
This article will provide the steps to setup the Secure (HTTPS/SSL) Sitecore JSS app instance.
The following steps will be involved in setting-up the Secure Sitecore JSS app instance:
> Creation of Sitecore JSS App
> Create self-signed certificate
> Make self-signed certificate as Trusted
> Setup of IIS Binding for Sitecore JSS app
> Create Host File entry for Sitecore JSS app
> Deploy Sitecore JSS App to Sitecore
Before getting into setup of Sitecore JSS app, it will be good to understand the benefits of Sitecore Headless Framework:
The Sitecore is True HeadlessCMS, which separate content from the design of that content. It means the Sitecore Experience Manager™ “decouples content from its presentation” and lets you write once and distribute anywhere.
With the release of Sitecore 9.x+, the Sitecore Experience Platform came up with true headless cms which will provide:
· Headless Content via API
· Personalization support with tracking
· Universal Tracker
· GraphQL support
You can build Headless application to target different channels by utilizing Sitecore JavaScript Services and ASP.NET Core SDK.
With the help of Sitecore True Headless CMS:
· Create content once and display it across all devices and channels
· Get scale, flexibility, and consistency with extractable, decoupled content
· Embrace new channels like IoT, VR, AR, and more to grow your business
· Leverage advanced features like personalization, testing, and analytics
· Capture customer data to drive engagement with new forms capabilities
If you are utilizing Sitecore JavaScript Services (JSS) SDK to build true personalized headless experiences then you can choose modern JavaScript UI libraries and frameworks like React, Vue, Angular and React Native.
Now we can start with steps required setup Secure Sitecore JSS application
> Creation of Sitecore JSS App:
To create a Sitecore JSS application we can follow Sitecore and Sitecore community articles:
https://jss.sitecore.com/docs/getting-started/quick-start
https://jss.sitecore.com/docs/getting-started/app-deployment
https://mysitecore.blog/2019/06/21/sitecore-jss-series-for-developer-how-to-setup-jss-1-of-5/
> Create self-signed certificate:
You can create self-signed certificate generally for Developer’s machine using Window PowerShell New-SelfSignedCertificate cmdlet which creates a self-signed certificate for testing purposes.
I generally use following options of New-SelfSignedCertificate cmdlet:
New-SelfSignedCertificate -CertStoreLocation “<location where certificate will be stored>” -DnsName "<Host name of Sitecore JSS app> " -FriendlyName "<Friendly name for certificate, generally host name> " -NotAfter “<DateTime e.g. Get-Date).AddYears(10) >”
For example, our Sitecore JSS app host name is "demo.one.app", then command to generate self-signed certificate is:
New-SelfSignedCertificate -CertStoreLocation C:\certificates -DnsName "demo.one.app" -FriendlyName "demo.one.app" -NotAfter (Get-Date).AddYears(10)
|
PSParentPath: Microsoft.PowerShell.Security\Certificate::LocalMachine\MY Thumbprint ---------- 6F4AAC72BFFD89C860CB0F7817F91FDDA17B1906 Subject ---------- CN=demo.one.app |
In the above output Highlighted string is certificate thumbprint.
Above command will generate the self-signed certificate and place inside Manage computer certificate > Local Computer\ Personal\Certificates:
> Make self-signed certificate as Trusted:
To make above created self-signed certificate as trusted certificate. For this we have to place copy of self-signed certificate under Manage computer certificate > Local Computer\ Trusted Root Certification Authorities\Certificates to make it trusted certificate.
Copy the self-signed certificate from Manage computer certificate > Local Computer\ Personal\Certificates and place under the Manage computer certificate > Local Computer\ Trusted Root Certification Authorities\Certificates:
> Setup of IIS Binding for Sitecore JSS app:
Generally, for every Sitecore site we create the IIS binding so that application/site can fulfil information required for requests to communicate with a Web site.
Provide the host name for the Sitecore JSS app which we used above as "demo.one.app" and select the SSL certificate as "demo.one.app":
> Create Host File entry for Sitecore JSS app:
You have to create the entry for your Sitecore JSS app in HOST file which located at C:\Windows\System32\drivers\etc, so that incoming request for your Sitecore JSS app can be identified.
127.0.0.1 demo.one.app
> Deploy Sitecore JSS App to Sitecore:
You can follow app setup steps mentioned at Sitecore JSS documentation at https://jss.sitecore.com/docs/getting-started/app-deployment#connecting-the-jss-app-to-sitecore
Some of the important steps are:
* Open the powershell and go to your jss folder, e.g. your newly created jss app present at C:\Amit\Dev\Sitecore\JSS\jss-demo-one
PS C:\Amit\Dev\Sitecore\JSS\jss-demo-one>
* Run the command jss setup, PS C:\Amit\Dev\Sitecore\JSS\jss-demo-one> jss setup, which will prompt you to enter following information:
* Open the folder C:\Amit\Dev\Sitecore\JSS\jss-demo-one\sitecore\config\<app name>.config file and in our case its jss-demo-one.config, and search for “<site patch:before="site[@name='website']”:
<site patch:before="site[@name='website']"
inherits="website"
name="jss-demo-one"
hostName="jss-demo-one.dev.local"
rootPath="/sitecore/content/jss-demo-one"
startItem="/home"
database="master" />
Change the name of hostName attribute to "demo.one.app":
<site patch:before="site[@name='website']"
inherits="website"
name="jss-demo-one"
hostName="demo.one.app"
rootPath="/sitecore/content/jss-demo-one"
startItem="/home"
database="master" />
* Run jss deploy config
* To get the correct certificate thumbprint, run command using wrong certificate thumbprint
jss deploy app --includeContent --includeDictionary --acceptCertificate test
After getting the correct certificate thumbprint, run the same command with correct certificate thumbprint:
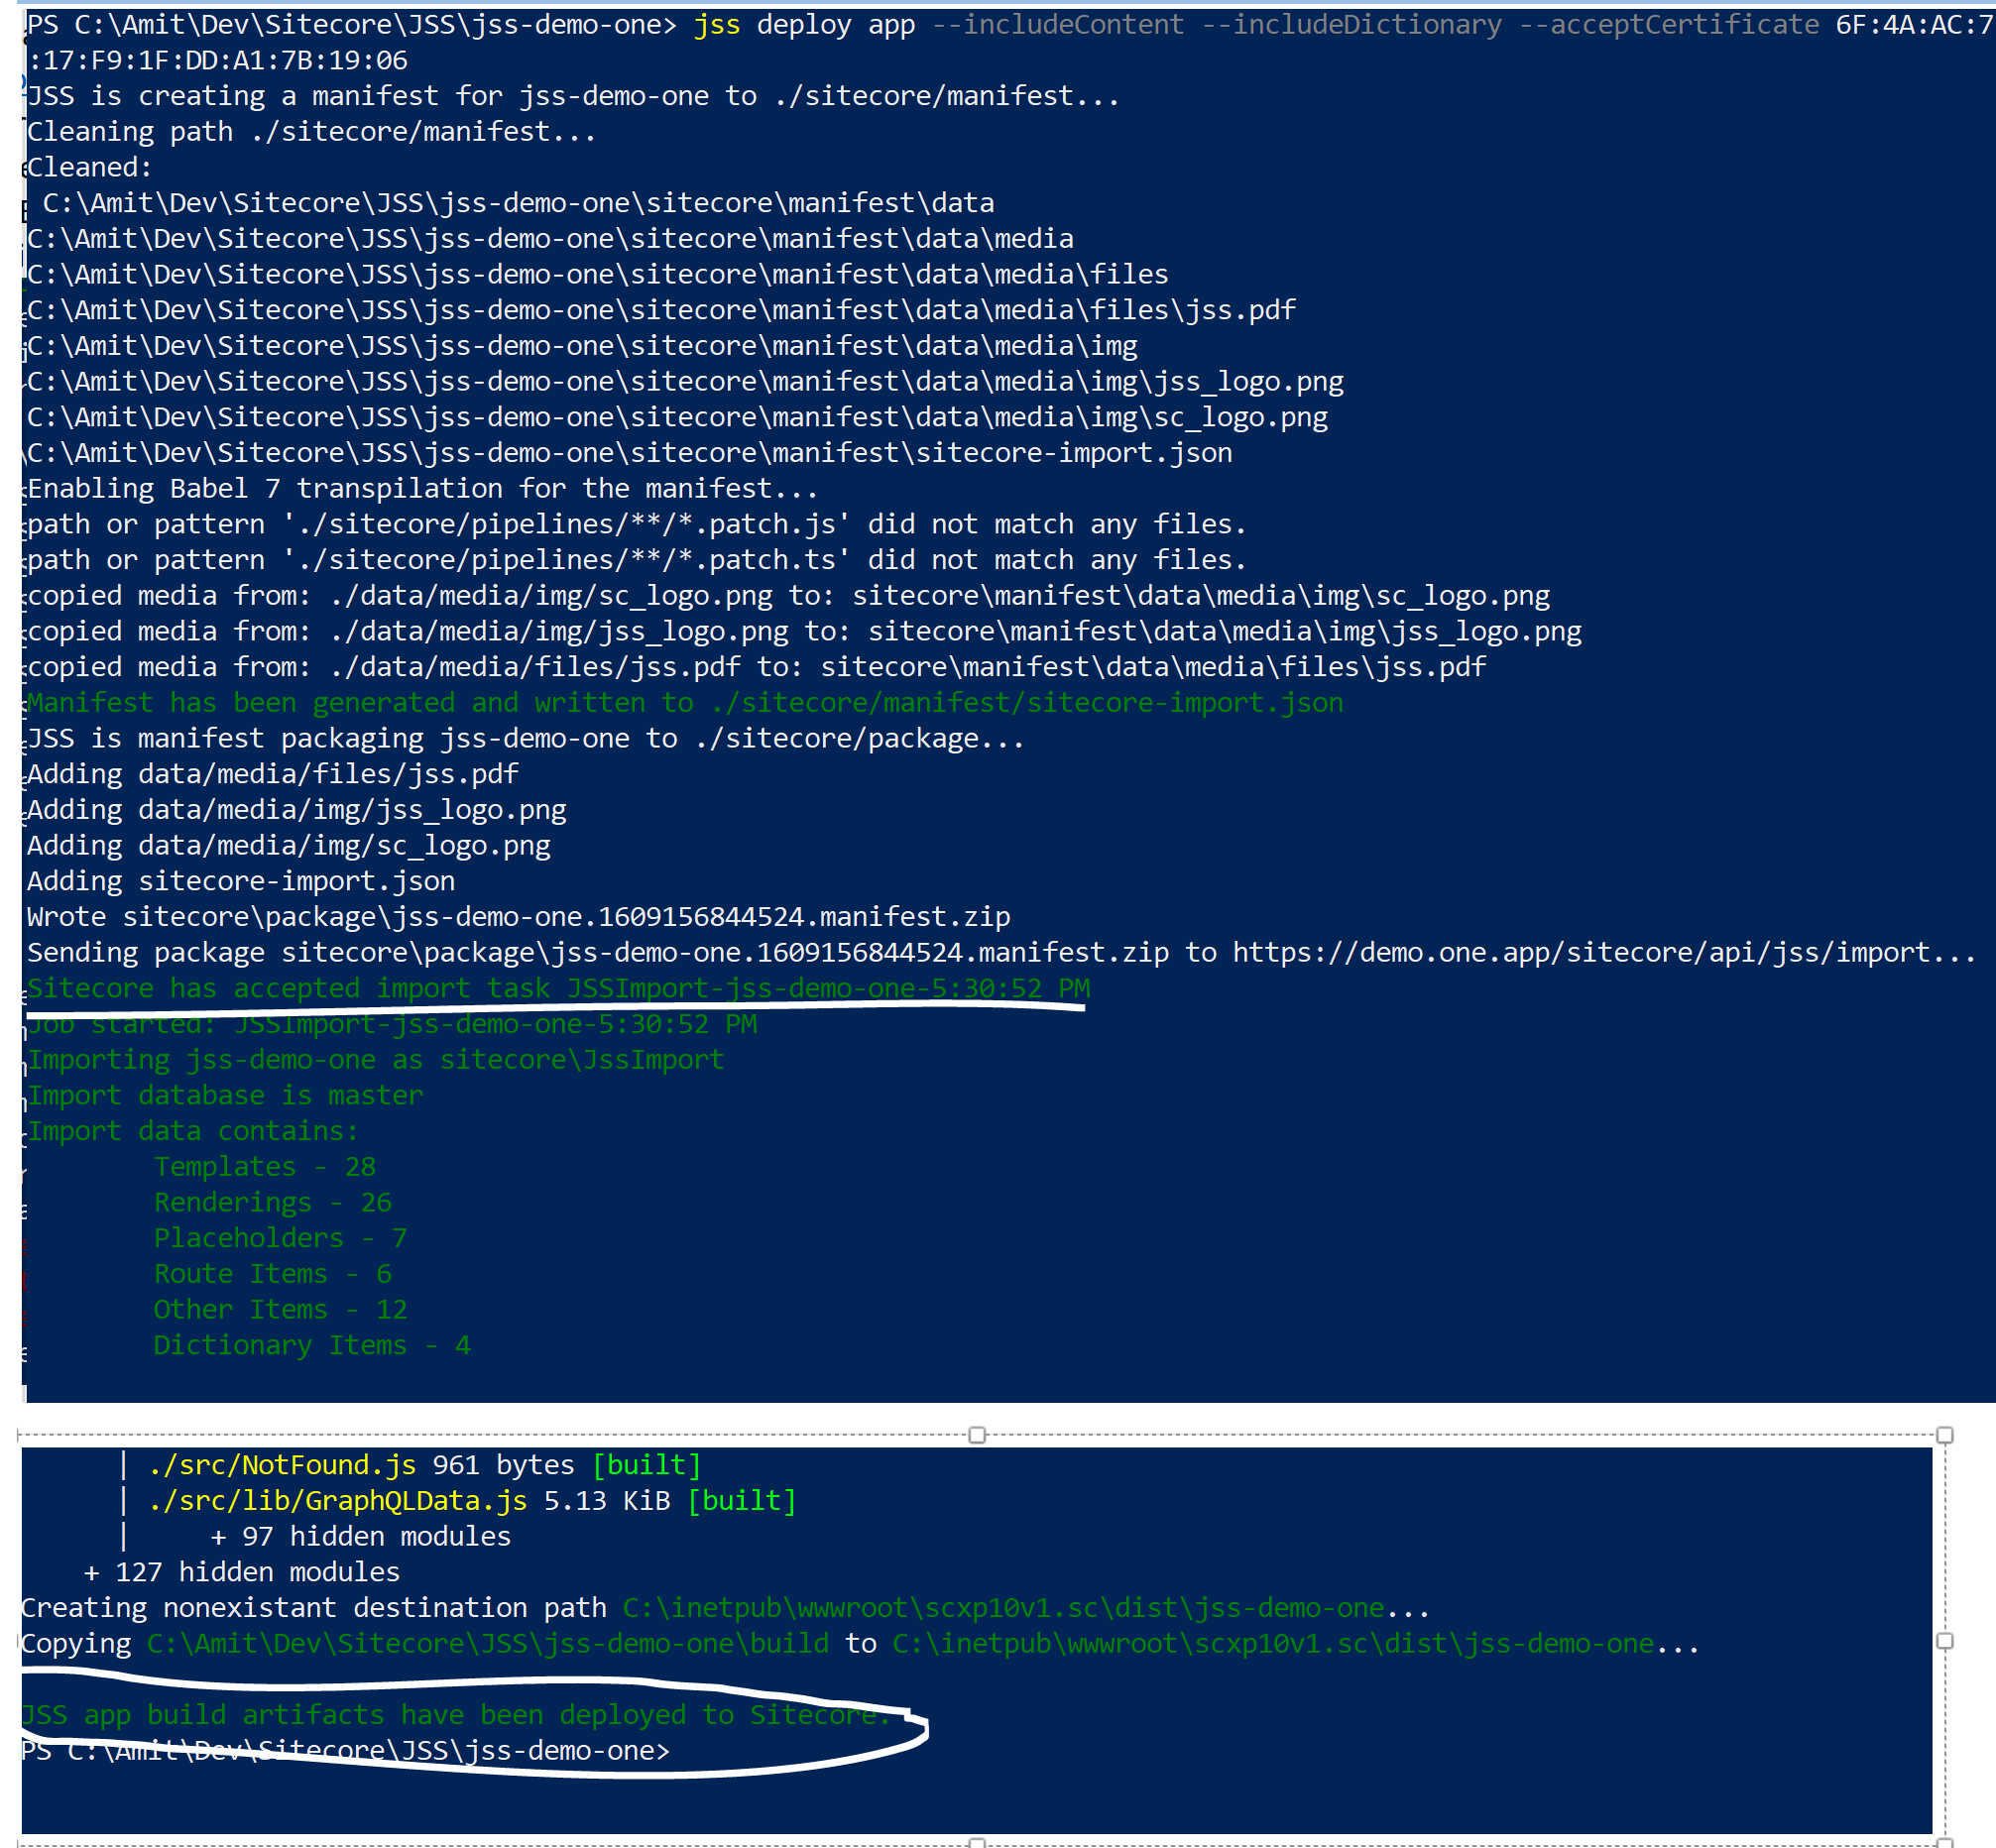
jss deploy app --includeContent --includeDictionary --acceptCertificate 6F:4A:AC:72:BF:FD:89:C8:60:CB:0F:78:17:F9:1F:DD:A1:7B:19:06
if you will get message “Sitecore has accepted import task JSSImport-<JSS App Name>-HH-MM-SS A/PM”
Check more details at https://jss.sitecore.com/docs/getting-started/app-deployment#step-3-app-deployment > 3.1: Local Sitecore Instance
* Now go to Sitecore instance and publish the Sitecore site.
* Access the site which setup at Setup of IIS Binding for Sitecore JSS app, i.e. https://demo.one.app/ :
After above steps you will not see any mixed content error for Sitecore JSS API’s. I hope this article will be helpful for Sitecore Community to setup the secure Sitecore JSS site.


