
Sitecore Error Troubleshooting: Sitecore Solr Connectivity Issue:: Part-1
How to verify Sitecore 9.1 (IaaS and Azure PaaS) + Solr (IaaS) Connectivity
Sitecore Solr connectivity issue:
• Part-1 : Sitecore Solr connectivity issue details with ways to check the connectivity
• Part-2 : How to resolve Sitecore Solr connectivity in Sitecore XP Single Topology
• Part-3 : How to resolve Sitecore Solr connectivity in Sitecore XP Scaled/Distributed Topology


1 sitecore_core_index
2 sitecore_fxm_master_index
3 sitecore_fxm_web_index
4 sitecore_marketing_asset_index_master
5 sitecore_marketing_asset_index_web
6 sitecore_marketingdefinitions_master
7 sitecore_marketingdefinitions_web
8 sitecore_master_index
9 sitecore_suggested_test_index
10 sitecore_testing_index
11 sitecore_web_index
If anyone of the Sitecore Solr core not present at Solr instance then create it: for example sitecore_master_index not present


Step-6: Validate name of the Sitecore cores in the Solr site if manually created
In the Step-1, we created the Sitecore Solr cores manually in Solr site and these name should be matched with Sitecore indexes name (which you can find via Showconfig.asxp in Sitecore).
How to verify Sitecore 9.1 (IaaS and Azure PaaS) + Solr (IaaS) Connectivity
Sitecore Solr connectivity issue:
• Part-1 : Sitecore Solr connectivity issue details with ways to check the connectivity
• Part-2 : How to resolve Sitecore Solr connectivity in Sitecore XP Single Topology
• Part-3 : How to resolve Sitecore Solr connectivity in Sitecore XP Scaled/Distributed Topology
In this article, I will explain how to check the connectivity between the Sitecore instance and Solr (IaaS) instance.
Problem Statement:
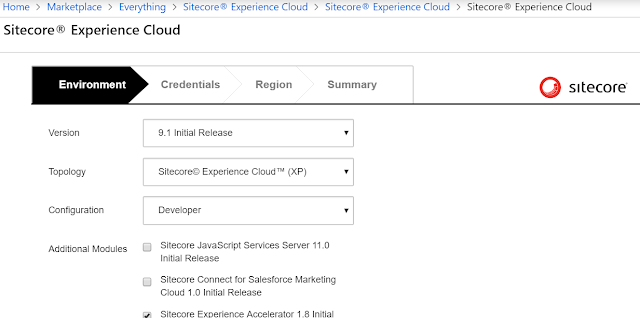
I was spinning up Sitecore 9.1 (Initial Release) Azure PaaS XP topology with Developer configuration and search provider was Solr (IaaS) and Solr instance already created in Azure box and url is https://12.832.11.201:8983/solr and its using Self-Signed certificates.
The Solr url https://12.832.11.201:8983/solr accessible via browser.

After completion of web app creation, I tried accessing the instance with url: https://ak-sitecore-91-123456-single.azurewebsites.net/ and logged into Sitecore Launch Pad > Control Panel > Indexing > Indexing Manager:
Was not loading the Solr indexes.
Note: Same way we can verify above settings in Sitecore IaaS instance.
Steps to verify Sitecore and Solr connectivity:
Step-1: This steps can be used for both Sitecore Azure PaaS and IaaS Instance
When we are creating the Sitecore instance by providing the Solr url then sometimes, Sitecore related cores not be created. To verify that go to your Solr url and verify total 11 Sitecore cores present or not:

The 11 Sitecore Solr cores/collections are:
2 sitecore_fxm_master_index
3 sitecore_fxm_web_index
4 sitecore_marketing_asset_index_master
5 sitecore_marketing_asset_index_web
6 sitecore_marketingdefinitions_master
7 sitecore_marketingdefinitions_web
8 sitecore_master_index
9 sitecore_suggested_test_index
10 sitecore_testing_index
11 sitecore_web_index
- Open the command prompt in Administrator mode.
- Go to bin folder of Solr “c:\solr-6.6.2\bin”
- Run the command “solr create -c sitecore_master_index”
- After execution of command, go to c:\solr-6.6.2\server\solr\sitecore_master_index\conf folder and place the "managed-schema" file from your existing Solr core instance of sitecore_master_index (<Working Solr instance>\server\solr\sitecore_master_index\conf ). If you are not having running Solr instance then you can take managed-schema of Sitecore 9.0.2 instance from:
- Repeat above steps for all missing Sitecore Solr cores.
- Restart the Solr service
- Restart the Sitecore instance or Sitecore Azure App Service
- Login into Sitecore instance and access the itecore Launch Pad > Control Panel > Indexing > Indexing Manager and verify that Solr indexes are loading or not.
- If Solr indexes are loading then re-build all the indexes and check count of documents (numDocs) in each Sitecore Solr core at Solr instance.
- If Solr indexes are not loading then proceed to next step.
This error usually occurred when you are trying to setup Sitecore XP Scaled topology.
Step-2: This step needs to be verified if Solr deployed into different box
In this step we will verify the Inbound and Outbound rule in Solr box: How to open ports to a virtual machine with the Azure portal.
Please check reference articles for this:
Also enable the port 8983 for Public access to verify the connectivity.
Step-3: This step needs to be verified if we are using Sitecore Azure PaaS Instance
In this step, we will verify that Sitecore Azure PaaS instance being able to contact Solr box or not.
- Login into https://portal.azure.com > Go to Resource groups > Select Resource Group in which Sitecore Azure PaaS instance created.
- Search the App Service ak-sitecore-91-123456-single.
- Click on Advance Tools> Go > Debug Console > CMD:

How to directly check the KUDO tool directly with App service url
https://ak-sitecore-91- 123456-single.azurewebsites.net/:
>Add the -scm before the .azurewebsites.net like:
https://ak-sitecore-91-123456-single- scm.azurewebsites.net/
- Enter the tcpping and see it’s recognizing the command or not:

Now access the Solr ip address with IP Address 12.832.11.201:8983 and see request coming or
not: like below
D:\home>tcpping 12.832.11.201:8983
Connected to 12.832.11.201:8983, time taken: 244ms
Connected to 12.832.11.201:8983, time taken: 15ms
Connected to 12.832.11.201:8983, time taken: 29ms
Connected to 12.832.11.201:8983, time taken: 32ms
Complete: 4/4 successful attempts (100%). Average success time: 80ms
Step-4:
In the Step-3, we verified that connectivity happening from Sitecore box to Solr box. Now we will cross check that connection string for Solr clearly mentioned or not in the Sitecore instance.

Now go to site>wwwroot>App_Config>ConnectionStrings.config and look for solr.search, and check that its pointing to correct Solr instance:
<add name="solr.search" connectionString="https://12.832.11.201:8983/solr" />
Note: Same way we can verify above settings in Sitecore IaaS instance. Change the url of Solr, if not correct.
Step-5: This steps can be used for both Sitecore Azure PaaS and IaaS Instance
By performing above mentioned steps, if still Solr indexes are not loading into Sitecore. Then we have to create the new core in the Solr with documents/records and try to access this Solr core using the Solr.NET via ASP.NET MVC application and will deploy into Azure Web App. It will help us to understand that Solr connectivity:
- Available to different Resource Group and resources
- Inbound and Outbound rules are working
- Solr instance available
Now we will create the Solr core (or collection) and configure the solr schema :
- Open the command prompt in Administrator mode.
- Go to bin folder of Solr “c:\solr-6.6.2\bin”
- Run the command “solr create -c samplecollection”

Now add sample document to newly created core:
- In the command prompt (Administrator mode), go to folder "<Drive>:\<Solr Instance folder>\example\exampledocs. This folder will contains the sample documents which can be used in our newly created Solr core or collection. .
- Run the below command:
java -Djavax.net.ssl.keyStorePassword=secret -Djavax.net.ssl.keyStore=../../server/etc/solr-ssl.keystore.jks -Djavax.net.ssl.trustStore=../../server/etc/solr-ssl.keystore.jks -Djavax.net.ssl.trustStorePassword=secret -Durl=https://localhost:8983/solr/samplecollection/update -jar post.jar *.xml
In the above command, change :
- Solr certificate password from secret to your solr certificate password. By default certificate password is secret.
- Solr url with port number.
- Solr core or collection name.

Now access the url https://localhost:8983/solr/samplecollection/select?indent=on&q=*:*&wt=json in browser and your will see the search results:

Now, we will try to create the sample ASP.NET MVC project using Solr.NET to access the newly created Solr Core:
- Create new ASP.NET MVC project and add the SolrNet package via “Manage NuGet Packages”
- Create the Product model:
- Add logic to access the Solr Core via Solr.NET:
- Now access the model in view to display required results from Solr instance:
The complete ASP.NET MVC code to verify the Solr connectivity present at https://github.com/AmitKumar-AK/CT.SC/tree/master/src/Foundation/Utilities/SolrIndexValidation
After executing the code, you will find the results from Solr core:

Now, we identified that, Solr instance accessible outside of Solr box from local system.
After executing the code, you will find the results from Solr core:

Now, we identified that, Solr instance accessible outside of Solr box from local system.
Next step is to deploy above created ASP.NET MVC application into Azure Web App and verify that it’s accessible or not. We can follow the link https://www.c-sharpcorner.com/article/deploy-asp-net-mvc-application-to-windows-azure/ to deploy ASP.NET MVC application into Azure. If Solr instance accessible from Azure Web App then it's mean there is no issue with the Solr.
Step-6: Validate name of the Sitecore cores in the Solr site if manually created
In the Step-1, we created the Sitecore Solr cores manually in Solr site and these name should be matched with Sitecore indexes name (which you can find via Showconfig.asxp in Sitecore).
By performing above steps, we found that there is no issue with Solr.
In the upcoming articles, we will verify the Solr Core's Schema and Sitecore instances (Content Delivery and Content Management) configuration files for Sitecore XP Single and XP Scaled topologies and will try to load the Solr indexes in the Sitecore Indexing Manager.
Note: In the above steps and code https://github.com/AmitKumar-AK/CT.SC/tree/master/src/Foundation/Utilities/SolrIndexValidation, please use your respective Sitecore , Solr installation folder and Solr Url.
Sitecore Solr connectivity issue:
• Part-1 : Sitecore Solr connectivity issue details with ways to check the connectivity
• Part-2 : How to resolve Sitecore Solr connectivity in Sitecore XP Single Topology
• Part-3 : How to resolve Sitecore Solr connectivity in Sitecore XP Scaled/Distributed Topology